| Toyota Tundra 2021 and older | ||||||||
|
||||||||
Clean area thoroughly with soap and water solution and wipe completely dry. Use alcohol pads to prep the tape application area and let dry. Wait until after Tailgate Seal is installed before applying very firm pressure (25lbs.), to secure adhesive bond. If necessary, Tailgate Seal can be removed and repositioned prior to applying very firm pressure (25lbs.). Pictures shown below are for the left sidewall and tailgate bottom gap. NOTE: Large Tailgate Seal is NOT used for 2021 and older Tundra |
||||||||
 |
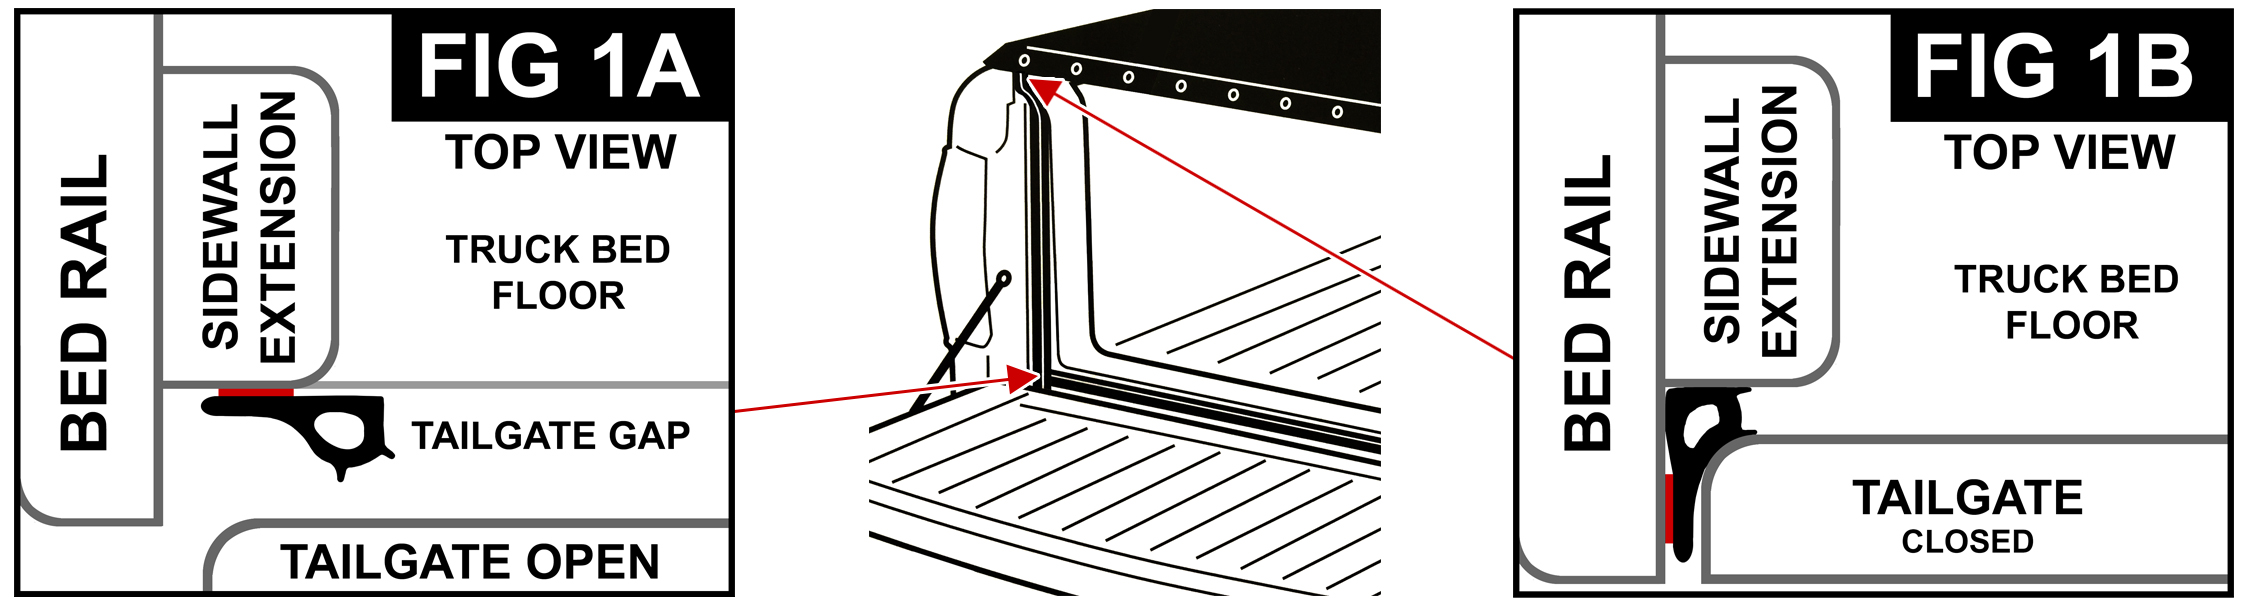
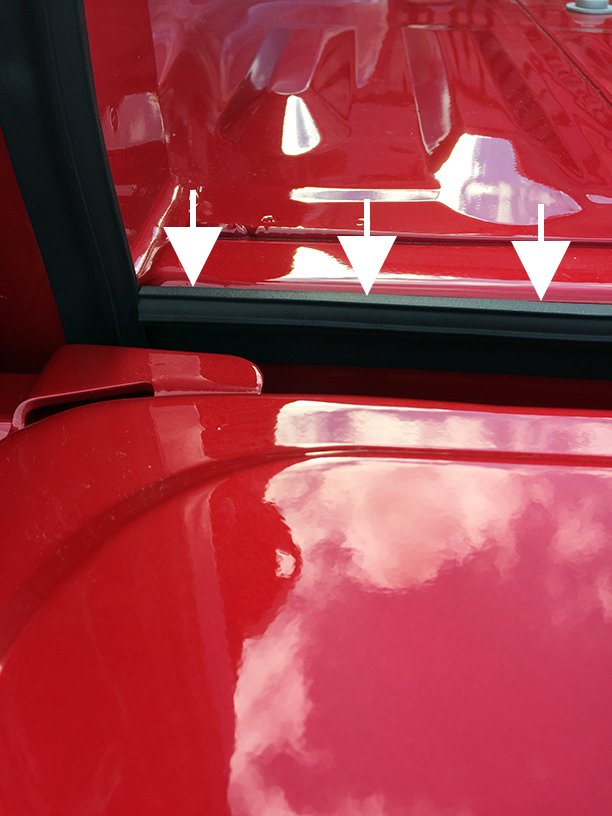
STEP 1: ATTACHING TO SIDEWALL USING STANDARD TAILGATE SEAL Start 1” below truck bed floor and attach Standard seal to the rear corner edge of the left sidewall extension (FIG 1 & 1A). Continue straight up, applying light pressure to adhesive and stop when 6” from the rubber stop. Keeping adhesive off surface, mark the seal where it will be flush to bottom of rubber stop. Continue up to rubber stop and apply light pressure to adhesive. Close tailgate and inspect from the inside to see if there is light through the sidewall. Open tailgate and make adjustments by removing seal and repositioning. Once seal is positioned apply very firm pressure (25lbs.) to secure adhesive bond. Duplicate for right sidewall. |
|||||||
 |
||||||||
 |
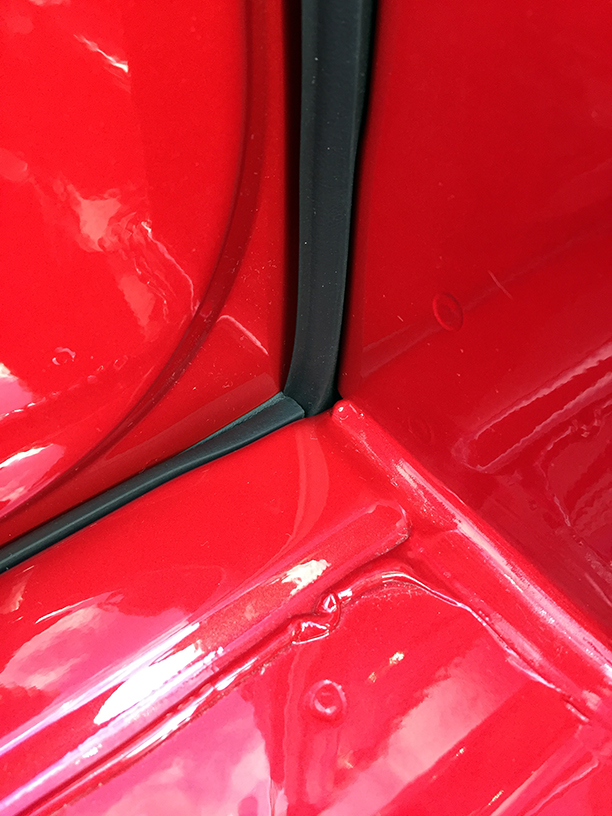
STEP 2: ATTACHING TO TOP OF SIDEWALL USING STANDARD TAILGATE SEAL Take roll of seal and remove approximately 10” of liner. Flush to the top of rubber stop (FIG 2). When nearing the top of sidewall extension, gradually begin rotating seal 90° degrees counter-clockwise, as you proceed up. When even with the top of bedrail, the top of seal should be facing forward and the taped side of seal should be flush with the sidewall of the bedrail (FIG 2B). Cut excess seal. Once seal is positioned apply very firm pressure (25lbs.), especially at rotation points, to secure adhesive bond. Duplicate for right sidewall. |
|||||||
 |
STEP 3: ATTACHING TO TOP OF TAILGATE USING STANDARD TAILGATE SEAL NOTE: For larger gaps substitute Standard seal with Large seal and apply either bulb side outwards or bulb side inwards. Once seal is positioned apply very firm pressure (25lbs.) to secure adhesive bond. Duplicate for right sidewall. |
|||||||
 |
STEP 4: ATTACHING TO TAILGATE BOTTOM GAP USING STANDARD TAILGATE SEAL Most often bulb side is up for Tundra (FIG 4).
To evaluate the best positioning for the tailgate gap, cut a 1” (2.5cm) test piece and align the top of bulb with the truck bed floor and attach. Stand to the side of truck and raise tailgate until bulb makes contact with tailgate. |
|||||||
STEP 5 |
||||||||
|
||||||||

