How to install Extruded Solutions' Tailgate Seal with Taper Seal®
ITEMS REQUIRED: Scissors, clean rag and soap solution.
Extreme temperatures will result in poor adhesive performance. Apply only if air and surface temperature is between 55° - 105°F (13° - 40°C).
Avoid touching adhesive after peeling off red liner. Repositioning of seal should not be done more than 3 times and only 1 time if the temperature is above 80°F (13°C).
Click on photo for an enlarged view
RAM with Multifunction Tailgate
Clean area thoroughly with soap and water solution and wipe completely dry. Use alcohol pad to prep the tape application
area and let dry. Wait until after Tailgate Seal is installed before applying very firm pressure, to secure adhesive bond. If necessary, Tailgate Seal can
be removed and repositioned prior to applying very firm pressure. Pictures shown below are for the left sidewall and tailgate gap.
STEP 1
Clean area thoroughly with soap and water solution and wipe dry. Use alcohol pads to prep the tape application area and let dry. Wait until after STEP 5 to apply very firm pressure to secure adhesive bond for the sidewalls. Do not reposition seal after applying very firm pressure (25lbs.) to secure adhesive bond.
STEP 2: ATTACHING TO SIDEWALLS
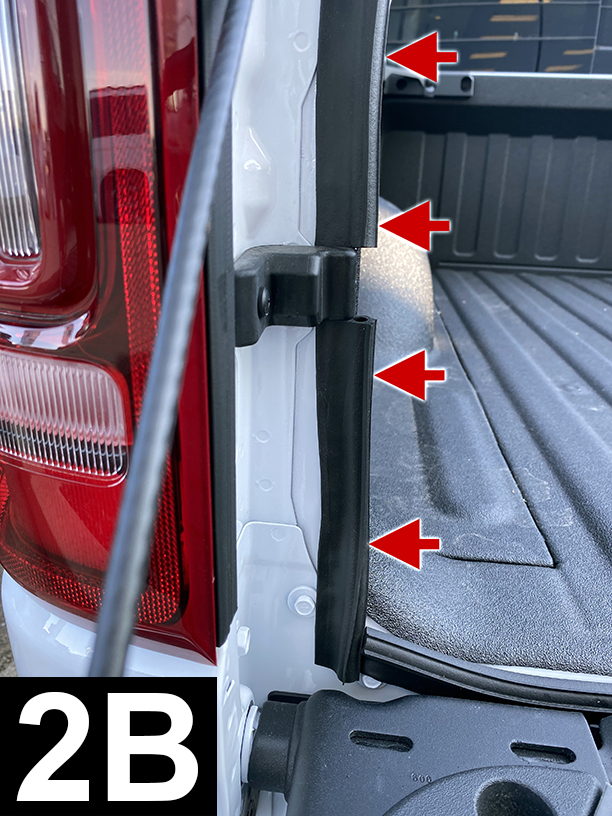
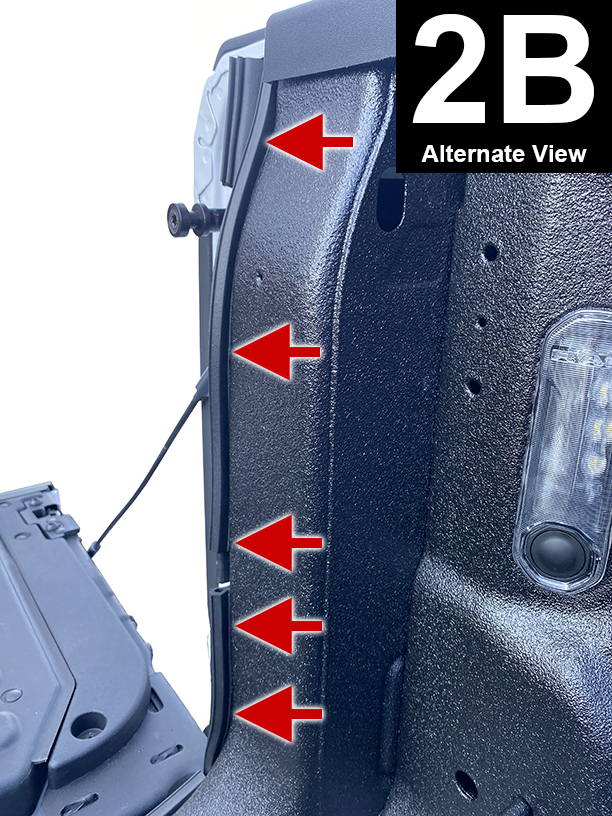
Start 1” (2.5 cm) below truck bed floor and attach seal to the rear corner edge of the left sidewall extension (2A). Continue up and flush seal to bottom of rubber stop and cut to fit (2B). Flush seal to top of rubber stop and continue up to top of sidewall. Cut to fit (2C). Apply light pressure to adhesive. Duplicate for right sidewall.
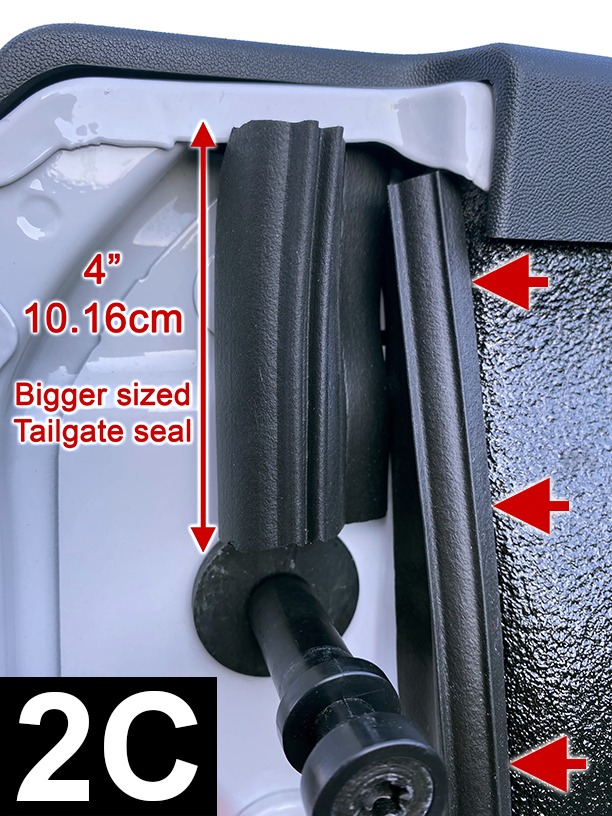
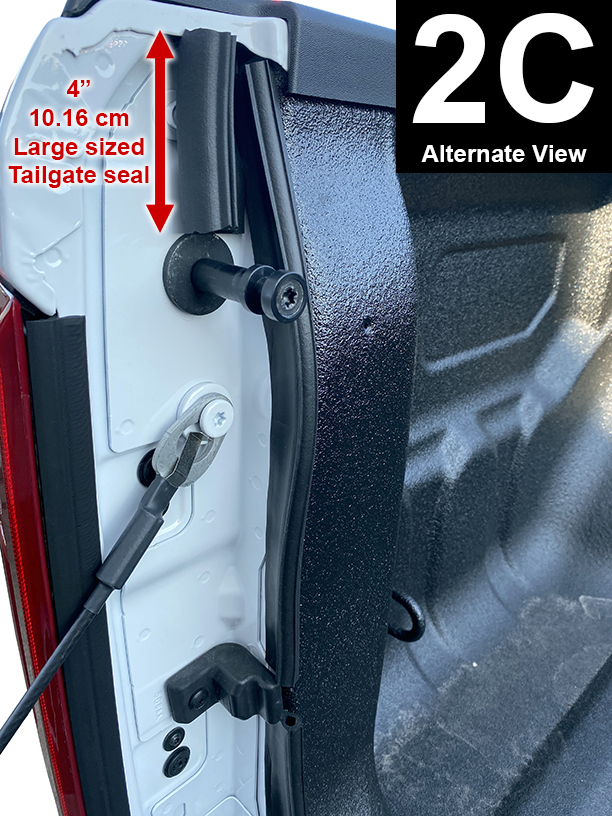
STEP 3: ATTACHING LARGE TAILGATE SEAL TO TOP OF SIDEWALLS
Take the Large Tailgate Seal, cut a 4” (10.16cm) piece and attach as shown in 2C and 2C Alternate View. Apply light pressure to adhesive. Duplicate for right side.
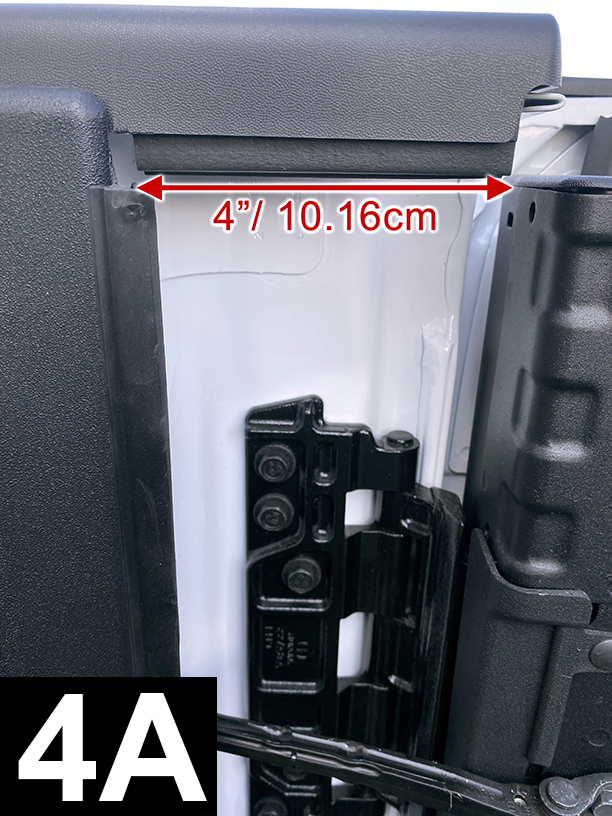
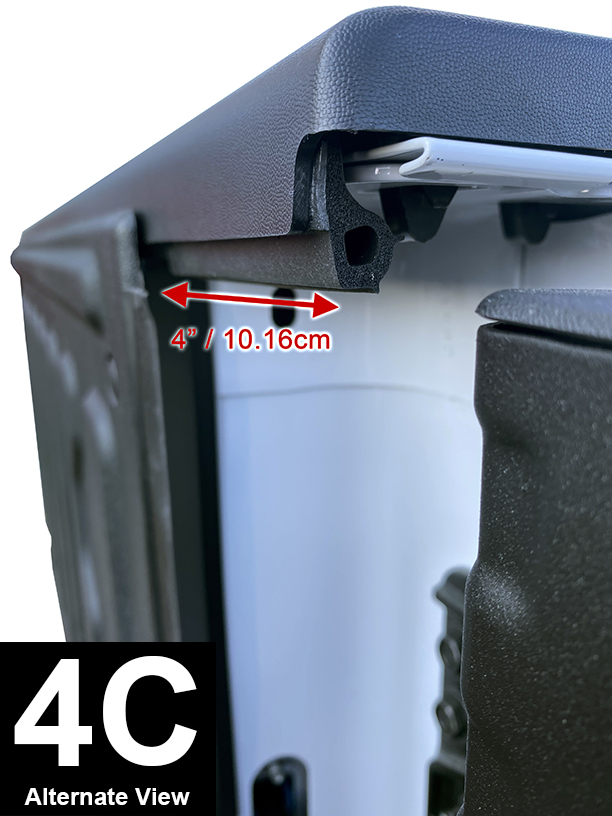
STEP 4
Cut a 4“ (10.16cm) piece of Tailgate Seal and apply to inside top of left tailgate rail (4A and 4A Alternate View). Apply light pressure to adhesive.
STEP 5
Close tailgate. If you see light through the sidewalls make small adjustments by removing the seal and repositioning. If there is still light then cut pieces of seal
as needed, and attach to sidewalls
and/or tailgate.
Do not attach adhesive to seal. Open
tailgate. Apply very firm pressure (25lbs.) to secure adhesive bond.
STEP 6: ATTACHING TO TAILGATE GAP
To evaluate the best positioning for the tailgate gap, cut a 1” (2.5cm) test piece and align the top of bulb with the truck bed floor. Stand to the side of truck and raise tailgate until bulb makes contact with tailgate. Compression and/or slight rolling of the bulb is okay, however, if the bulb rolls downwards too much as the tailgate is closing and you can see the tape, then bulb has rolled too much. This can cause added stress on the adhesive and possible separation.
If you see that the bulb is rolling too much then invert 1” test piece so that bulb side is down. Raise tailgate and make sure no light is visible through the 1” piece. Adjust 1” piece higher or lower to seal out the light.
After determining if the bulb should be up or down and how high or low, remove 1” piece and pick up one end of the continuous seal. Start at either end, peel back a section of liner and flush to seal on the sidewall.
Attach in sections and apply light pressure to adhesive. Flush to seal on the other sidewall and cut to fit. Apply very firm pressure (25lbs.) to secure adhesive bond.
STEP 7
Apply very firm pressure, once more, to secure the entire adhesive bond. Leave tailgate open for 30 minutes. If the air temperature will fall below 50°F (10°C) within the next 24 hours or, if applying to a surface other than paint such as plastic or a spray on bed liner, then leave tailgate open for 24 hours.
Inside view showing left side of tailgate when closed